
How to Arrange Photo Magnets on Your Fridge (5 Layouts That Look Curated)
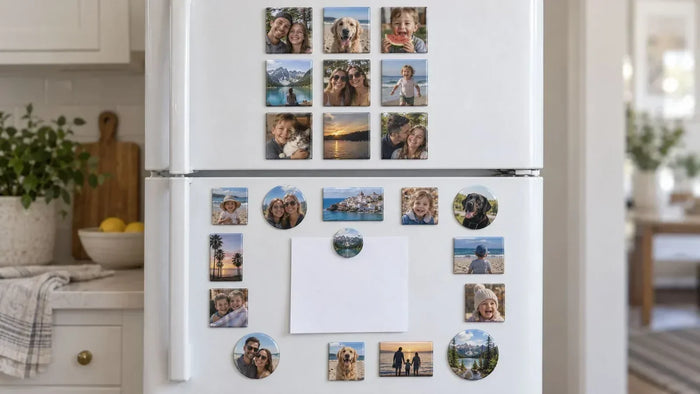
There is a fine line between a fridge that looks warmly lived in and one that looks like a bulletin board exploded. Magnets for the fridge are wonderful, but a little arrangement goes a long way. Here are five simple layouts that turn a pile of photo fridge magnets into something that actually looks good, no design skills required.
1. The grid

The easiest way to look intentional is to line your magnets up in a neat grid. Pick a corner or a clear panel and arrange same size magnets in even rows and columns. A grid of square custom photo magnets reads like a little gallery wall and instantly tidies the whole door. This is the go to if your fridge currently feels chaotic.
2. The single column or row

If your fridge has a narrow panel beside the handle, a single vertical column of magnets is clean and modern. A row along the top works too. Limiting magnets to one line keeps the rest of the door open and makes each photo feel deliberate rather than crammed in.
3. Group by theme

Instead of scattering everything, cluster magnets that belong together. One group for the kids, one for travel, one for pets. Themed clusters give the eye a place to rest and make the fridge feel curated. It also makes it easy to swap a whole group when you have new photos.
4. Mix shapes on purpose

A wall of identical squares is clean, but mixing shapes can feel more lively if you do it with intention. Try a round personalized magnet as a focal point surrounded by squares, or alternate squares and taller rectangles. The trick is to repeat the mix so it looks like a pattern, not an accident.
5. The edge frame

Run magnets around the outer edge of the door and leave the center open for notes, the calendar, or the kids' artwork. This frames the working part of your fridge with photos and keeps the middle practical. It is a favorite for busy family kitchens.
A few small tips that make a big difference
- Less is often more. A handful of great photos beats a door packed edge to edge. Rotate the rest in and out.
- Keep the photos consistent. A loose color theme, like all warm tones or all black and white, pulls a mixed group together.
- Leave breathing room. A little space between magnets is what separates a gallery from a jumble.
- Refresh with the seasons. Swap in holiday or vacation photos a few times a year so the fridge always feels current.
Start with photos that pop
Any layout looks better when the photos themselves are bright and clear. If you are choosing which pictures to turn into refrigerator magnets, our guide to the best photos for fridge magnets is a good place to start, and our size guide helps you pick shapes that arrange well together.
However you lay them out, custom fridge magnets turn an ordinary appliance into the warmest corner of the kitchen. Pick your favorites, choose a layout, and browse our custom fridge magnets to get started. Your fridge is about to look a lot more like you.